- Credits: Click here to see the names of the Rama development team.
- Interviews: Click here to ask see interviews with and about Arthur C. Clarke and Gentry Lee, or to watch RamaWatch, interviews with the Newton astronauts, presented by Francesca Sabatini. If desired, you can skip to the end of nearly any video or animation in Rama by pressing the [Esc] key at any time while the video or animation is running.
Notice there is no "quit" option. The only way the player can quit the game (aside from a forced application shutdown) is through the control panel in the game itself. Just a detail of course, but it's rather surprising this option is not in the main game menu itself.
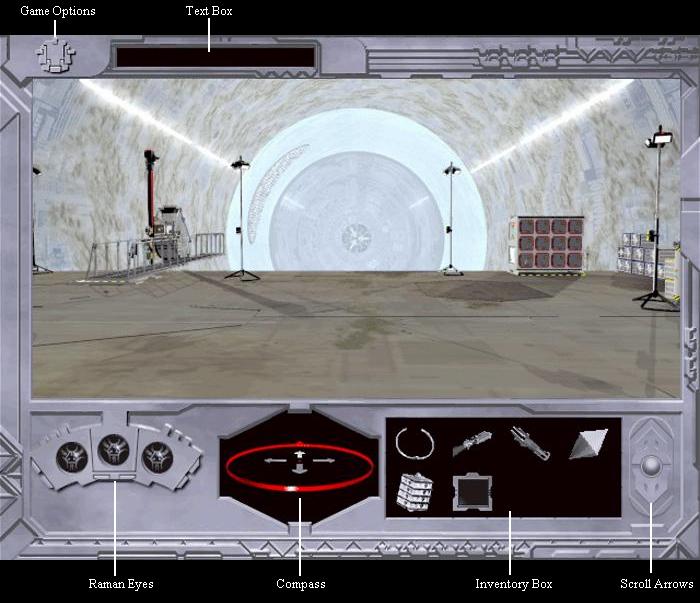
Main game screen
You can move around Rama by hovering the mouse to a certain direction in the main window. The cursor will change into a certain arrow type (left, right, forward, backward, up and down), depending which direction you want to go. Available directions are displayed by the white arrows in the compass below the main window. Orientation in Rama, and particularly in New York plazas, can be very confusing though. There aren't always 90 degree angles - in some areas there can be up to ten different directions to go to from a single standpoint. Since the player moves from one frame to another, rather than moving in real-time (such as in a first-person shooter), and walking distances vary, it can be hard to figure out where exactly you are. The compass doesn't indicate where you are, but the direction you are facing (the triangular spike on the red compass ring indicates the north, being the far end of the Rama cylinder) and which directions you can go to. Luckily there is a map feature in the arm computer, accessible either by selecting it from the inventory box (using the scroll buttons if necessary) and using it on the Raman eyes or by right-clicking it in the inventory box. A mini-map on the bottom toolbar would have been desirable though but, even with the map, it can be hard to find certain places.
There many items in Rama which can be picked up or activated (such as buttons). When hovering the mouse over such items, the cursor will change into a hand.
When you want to observe an inventory item select it from the inventory box and click it on the Raman eyes. The item will be shown in 3D in the game window where you can rotate it. You can also do various things with some inventory items, such as switching the tools of the ISA multi-tool. Some items can also be used on each other, such as using the blue filter on the ISA multi-tool flashlight to create a blue laser, or importing data cubes in the arm computer.
To use an inventory item in the main window, simply select it from the inventory box (the cursor will change in the form of the item) and click it on the place in the main window. When an item can be used on something, the cursor will turn red.
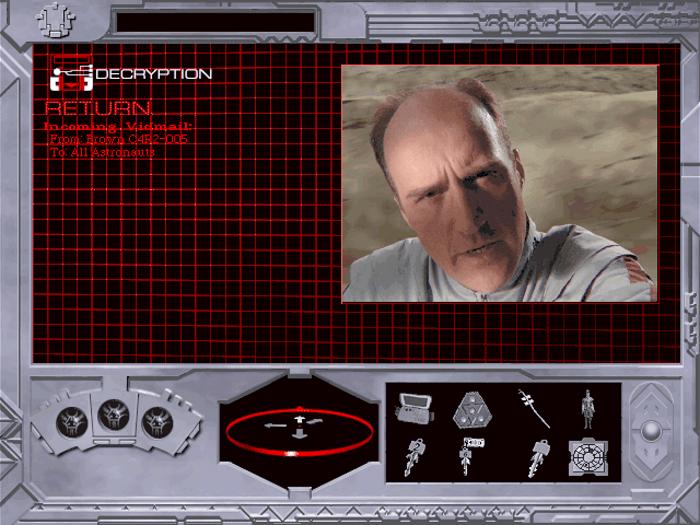
The text box on the top identifies inventory items or interface buttons when you hover the mouse over them. It also reveals when there is an incoming vid mail and when the last 10 seconds of the bomb timer are running. When selecting Puck (the little pocket robot) and hovering him over the main window, the text box will reveal what Puck sensors.
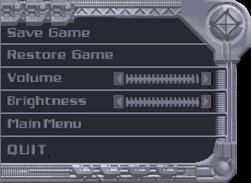
Game options
When you click the top left symbol of the game screen, the control panel will slide on the screen. Here you can save the game, restore a game, change the game volume and brightness, return to the main menu (game is NOT auto-saved!) or quit the game. Remember there is no quit button in the main game menu.
The arm computer
You get the arm computer in the beginning of the game. It is located in your locker (number 2). The arm computer has both a map feature and serves as a data storage device in which data cubes can be uploaded. From time to time you will also receive live vidmail from another crew member. The data cubes and live vidmails are stored, so you can watch them over and over again. Note that face-to-face interactions with other crew members are not recorded and therefore not stored.
Live vidmail coming in
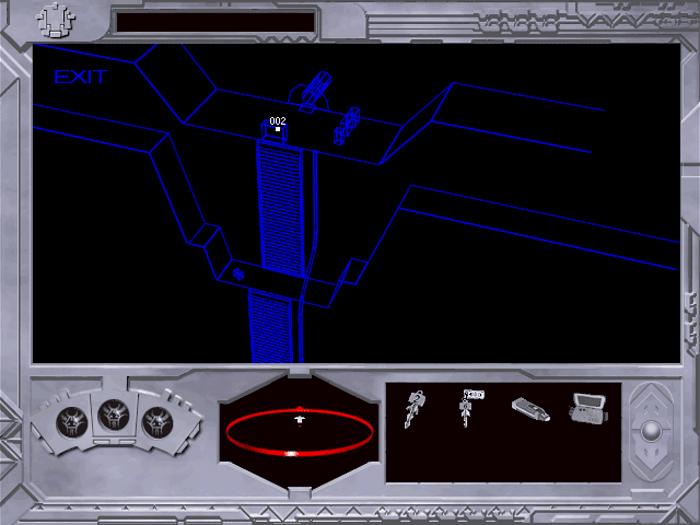
The map feature shows the area you are currently in, and only shows the places you have already visited, so the map develops the more you explore. The smaller the area you are in, the more the map will be zoomed in, and the more clear the hot spots (land marks) are. Your location on the map is represented by a red dot along with your ID number (02). Note that the map feature does not work while being in the central plains.
Map of the hub camp
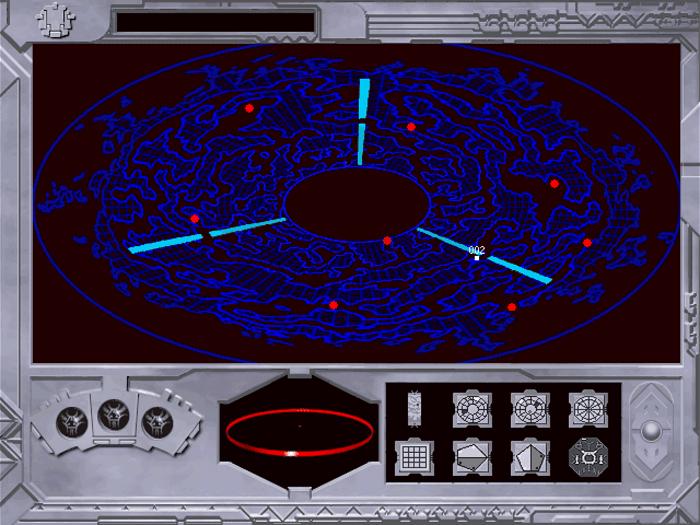
The radar map
The Central Plains map automatically appears whenever you leave a specific Central Plains area (first when you enter them by leaving base camp). By hovering the mouse over the map, areas that can be visited will highlight in red. The main areas (base camp, giant wheel, the biot garage, London and Bangkok) have a fixed location on the map, others (wandering biots and crew members) have randomized locations each game. Red dots on the radar map mark areas that other team members have noted as interesting and worthy of exploration, or an area where some activity is taking place, though not all sites are always open and some sites may move.
When clicking on a map area, a mini-map will show up, revealing buildings on the location and/or which crew member or biot is present. Crew members are identified by their ID number and biots are represented by green dots (for example dots in a triangular shape are crab biots). You can access the area by clicking on the mini-map or cancel the destination by clicking on the large Central Plains outside the mini-map. When no action is taken, you will automatically enter the selected area.